
How I made my Jurassic Goggles
This is how I made my “I-was-too-preoccupied-with-whether-or-not-I-could-I-didn't-stop-to-think-if-I-should-Jurassic-Goggles”
In May of 2019, Raspberry Pi asked me to present at Coolest Projects International :) So I made something that the audience could interact with. And again - I gave myself one month to finish. Here is what I did:
3D PRINTING
I started 3D printing and this is the stuff I used:
The whole thing is 3D printed - I found @jurassicpaul’s STL files from Thingyverse, sliced them all up with PrusaSlicer, and started printing. There are 6 parts in total, the hood, the yellow front, 2 lenses, and 2 light rings.
I printed the hood in black PLA and it took 43 hours to print. I sanded, applied bondo, sanded, sanded, bondo putty, and sanded (did I mention sanded?) for 5 days. Once it was completely smooth I primed it. I recommend drilling the front hole for the red LED. before priming and painting. I didn’t do this and messed up the paint. Don’t make my mistakes.

This print took about 43 hours

Prepping the bondo

I apply a thin layer of bondo to smooth

Sanding the bondo layer
Adding a bondo putty layer

Sanded it more

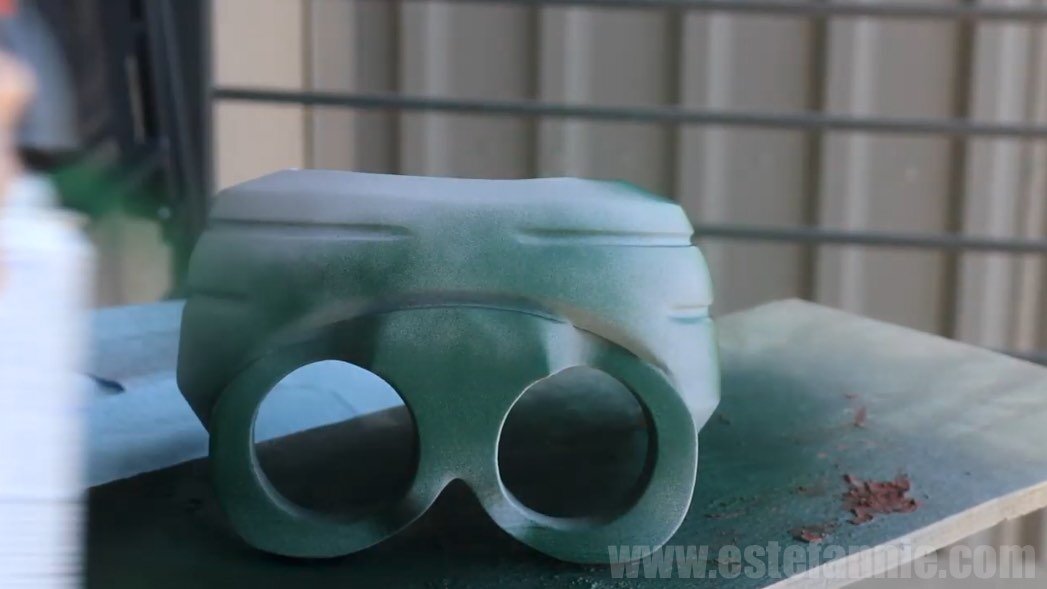
The primed goggles

Make sure you drill the hole for the front LED before you paint.
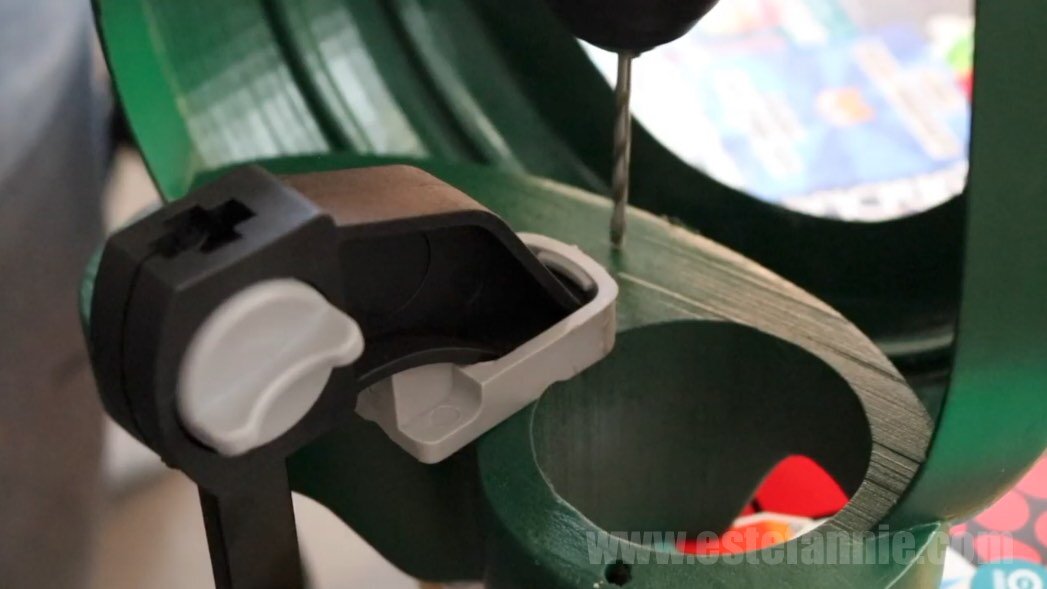
Drill both the front and the back to wire the LED.
The yellow front part took 20 hours to print and only ONE HOUR AND A HALF TO SMOOTH and this is because I used Polysmooth filament which smooths with alcohol. So I sanded it a bit, put it in the Polysher machine which sprays an alcohol mist, and the piece was smooth in 20 mins. I really liked this, it saved me a lot of time and looked amazing. The only limitation is the size of the Polysher machine - the goggles barely fit. I got it to stand with popsicle sticks and glue.

This print took about 20 hours

I sanded it for about an hour

I propped it up with glue and popsicle sticks

The Polysher spraying a mist of alcohol to smooth it

The final result
I printed the black lenses with black PLA, sanded and used bondo to smooth. And then I resized the light rings to make them a bit bigger (they seemed too small for the goggles) and printed them with the transparent PLA filament. No sanding or smoothing needed here.

The 3D printed lenses.

I re-sized the light rings. These are my few attempts.
Painting the Goggles
Stuff I used:
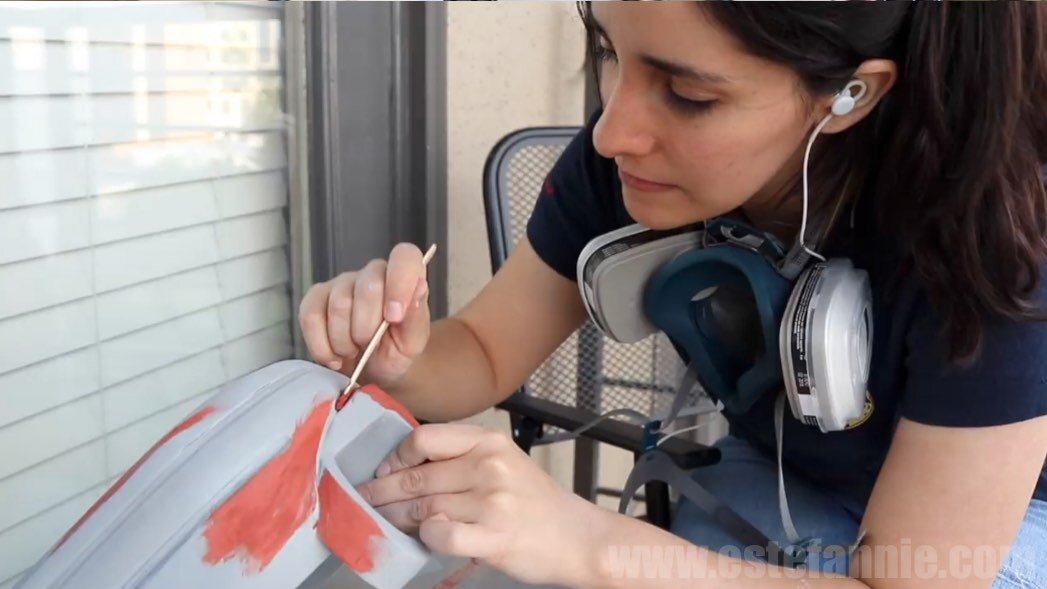
I painted the hood hunter green and the lenses black. The “Jurassic Park stripes” were not easy and I honestly don’t have any advice on how to do it. It took me about 4 tries. I’d mess up, sand and try again. I even practiced on wood. I still messed up. Save some patience for this bit.
The yellow front was printed in yellow and didn’t need any more finishing :)
Painting the goggles

My mistakes. I had to sand and re-do several times.

I finished it with a coat of clear enamel

Putting it together
I used glue to put all the parts together and it held well and still is~ This is the stuff I used:
The headgear is the welding helmet replacement part. I liked that it is adjustable and anyone can wear the googles and it is actually pretty comfortable. All I has to do was glue it to the goggles.
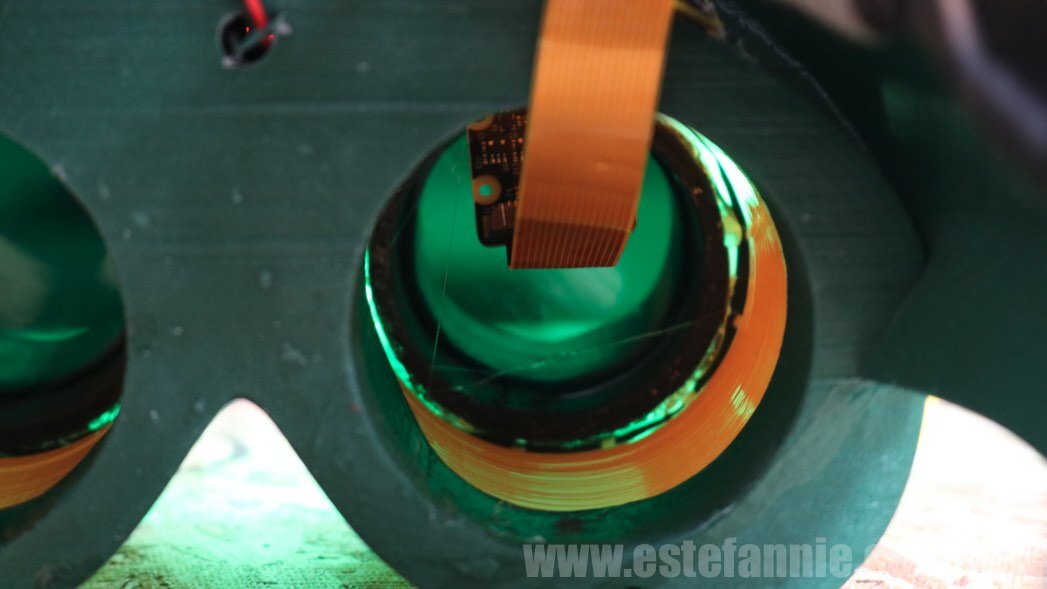
For the night vision effect, I used a green plastic sheet and cut out two circles and inserted them into the lenses.
I used the craft stick to prop the camera inside the lens.

Back view of the goggles
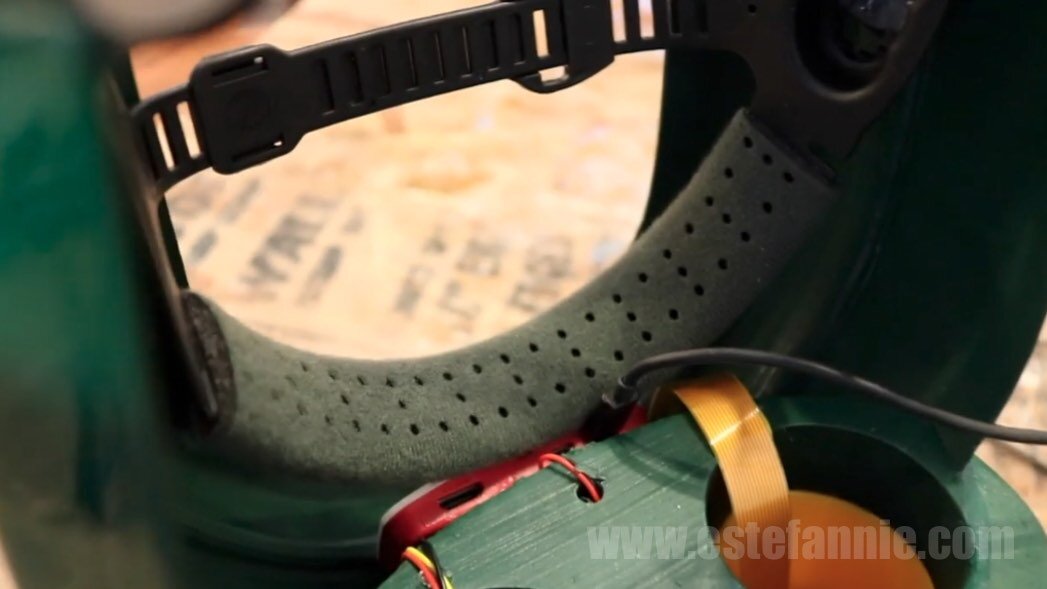
Inside view of the headgear mounted in the goggles

Top view of the goggles

I cut out two circles out of the green acetate

The green acetate inside the lens

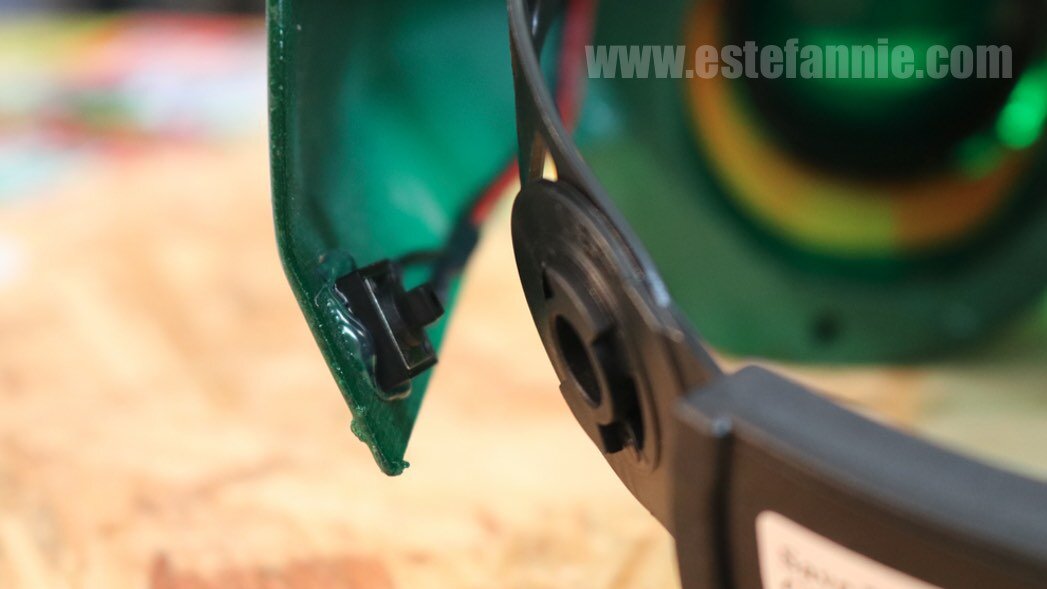
I glued all the parts together
The electronics
The goggles looked great...but I’m Estefannie, so I added electronics and connected it to the internet and made the first globally-triggered-mass-broadcasting-photon-emitting-and-collecting-head-unit. This is the stuff I used:
Portable Phone Charger
To make the LED rings, I cut up addressable LEDs and soldered them together while inside the printed goggle rings to hold the shape.
I used a Raspberry Pi Zero W to be the brains of the goggles. I mounted it inside the goggles in the front area at the top.
I soldered the LED rings, the red LED at the front, and the button straight to the Pi and the camera was wired to it with its ribbon wire.
To power the Pi, I connected it to a power bank that had a long wire so I could hold the battery in my pocket.

A single addressable LED

Soldering the LED rings inside the light rings to use as a guide

The finished LED ring

I re-sized the rings to fit the goggles better


The mounted Raspberry Pi Zero W in its case


Connecting it to the internet (or as some like to call these projects … I made it iot)
I wrote a python script that made these goggles take photos through the lens whenever someone mentioned @jurassicpi on Twitter.
This is the code:
https://github.com/estefanniegg/YouTube/blob/master/builds/jurassic_goggles/jurassic_park.py
The script scrapes Twitter* (takes all the data and uses it for stuff). WARNING: if you scrape too much Twitter bans your IP and your account, so don’t do this too much. This is why I added the button to turn the scraping off and on. It can run for about 10 mins or so at a time. The scraper checks if someone has mentioned @jurassicpi, if someone has, the script calls the camera and takes a picture and tweets it back mentioning the mentioner.
* I wrote this code in 2019, twitter api’s might have changed.
I made the Pi run the script at start-up (this is how you do that), so when I turned it on the script would run automatically. Once the script was running, the red LED would light up indicating that the goggles were ready to start scraping. To do that, I’d only need to press the scraping button.
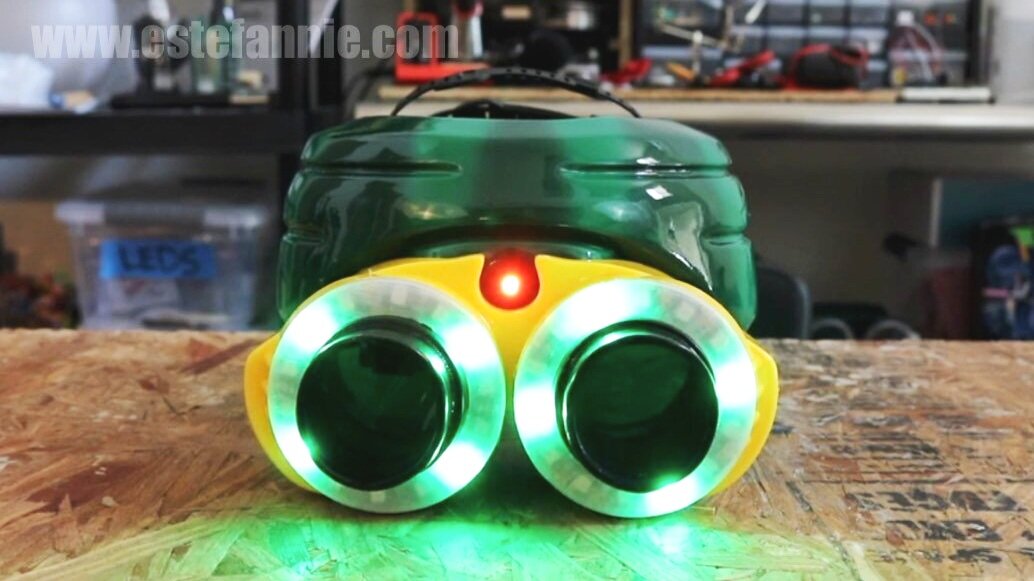
Once I hit the scraping button, the LED rings would turn into classic “Jurassic Park” mode and start looking for mentions. If someone had mentioned @jurassicpi the LEDs would flash white (for a better picture) and while the script tweeted the picture the LEDs would turn blue and then return to classic “Jurassic Park” mode to scrape Twitter. I made it this way to make it more interactive and to know exactly what the script was doing by just looking at the goggles.
I added a hold press function to the button just in case I wanted to take a picture and tweet it without a mention.

The Goggles connected to the power bank and to my hotspot
Scraper button

The goggles at Coolest Projects
There is still so much I’d like to add to the goggles to make them more like the ones in the movie, but who am I kidding, I’ll never touch them again…
This was a very nostalgic project as I was originally traumatized by the movie when my mom took me to the theater to watch it as a baby because she thought it was a movie about parks. Ok I wasn’t a baby but it felt like I was and I certainly wasn’t ready to watch a movie about deathly dinosaurs. I love that movie though and probably explains a lot about me. Ok byeeeeeeeeeeeeeeeeeeeeeeeeeeeeeeee
e
This is the video I made for this project: